Free Pattern - From Cyra Lewis
Ra Ra Skirt - age 1yr to 3yrs - Crochet and Knitting.
This Pull-On skirt measures:
Length .... 10.5" (27cm)
Waist .... 14" - 23" (36cm - 58cm)
the larger width is measured with the waistband stretched but still comfortable.
Swatch size: 4 inches = 15 tr (blo) x 9 rows
I work loosely. If you have a tight tension then your garment will end up slightly smaller.
Variations to ths size can be made by altering the thickness of the yarn, and by changing the hook size.
The purple 'Ra Ra' bottom piece is an open lacy pattern.
The stretchy waistband is knitted ribbing with crocheted belt loops and a ruffle belt that has the unique ability to 'grow' with the child.
Materials
Yarn 'A' : 1 ball Windsor Acrylic Double Knit Opal in Purple
Yarn 'B' : 1 ball Windsor Acrylic Double Knit Variegated to match
Crochet hooks - 3.5mm & 4mm
Circular Knitting Needles - 4mm
Abbreviations
(English Crochet Terminology)
prev.....previous
blo.....back loop only
tr2tog....treble 2 together
Instructions
Starting with the purple yarn and the 4mm hook we will make the 'Ra Ra' part of the skirt first.
Foundation Row :
Ch.90. Sl st to the first ch (making sure not to twist the foundation chains) to make a circle. You will now be working in the Round. The outside is the right side. Keep the right side facing you. Do not turn.
R1. -
Ch.3, 4 tr in same ch., ch.2, (skip next 2 ch.), dc in next ch., *ch.2, (skip next 2 ch.), 5 tr in next ch., ch.2, (skip next 2 ch.) dc in next ch., ** Repeat from * to **14 times. Ch.2, sl st to top of beg ch.3 stitch.
R2. -
Ch.3, 1 tr in each of next 2 sts., ch.2, 1 tr in same place as prev tr, 1 tr in each of next 2 sts., * ch.3, (now, work into the next shell), 1 tr in each of the next 3 tr, ch.2, 1 tr in same st., 1 tr in each of next 2 sts. ** Repeat the shell pattern from * to **to the end of the round, sl.st to the top of the beg st of that round.
R3. -
Sl st across the top of next 2 sts., (brings you to the tr just before the ch.2 sp.), ch.4, 3 dtr in the ch.2 sp., ch.2, 3 dtr in the same sp., 1 dtr in the next st., 1 dc in the ch.3 sp., * (skip 2 tr), 1 dtr in next st., 3 dtr in the ch.2 sp., ch.2, 3 dtr in the same sp., 1 dtr in the next st., 1 dc in the ch.3 sp., ** Repeat pattern from * to ** to end of round, sl st to 4th ch of starting st.
R4. -
Sl st across next 2 sts., ch.4, 1 dtr in next st., 3 dtr in the ch.2 sp., ch.2, 3 dtr in same sp., 1 dtr in each of the next 2 sts., * 1 dtr in 3rd dtr of the next shell, 1 dtr in the next st., 3 dtr in the ch.2 sp., ch.2, 3 dtr in the same sp., 1 dtr in each of the next 2 sts., ** Repeat the pattern from * to ** to the end of the round, sl st to the 4th ch of starting st.
R5. -
Sl st across next 2 sts., ch.4, 1 dtr in each of next 2 sts., 3 dtr in the ch.2 sp., ch.2, 3 dtr in the same sp., 1 dtr in each of next 3 sts., * (skip 4 dtr) 1 dtr in each of next 3 dtr., 3 dtr in the ch.2 sp., ch.2, 3 dtr in same sp., 1 dtr in each of next 3 sts., ** Repeat pattern from * to ** to the end of the round, sl st to 4th ch of starting st.
R6. -
Ch.6, * 2 dtr in next ch.2 sp., ch.5, 2 dtr in same sp., ch.2, 1 dtr in the diamond shaped sp between 2 shells of the prev round, ch.2, ** Repeat pattern from * to ** to end of the round, ending with 1 tr in 4th ch of beg ch.6 st.
R7. -
Sl st back into last dtr made, dc in same st., * ch.5, dc in the next dtr., 1 pct [a picot consists of ch.3 and a sl st into 3rd ch from hook], 1 dc in next st., <1 dc., 1 pct., 2 dc., 1 pct., 2 dc., 1 pct., 1 dc.,> (< to > are made in the same ch.5 sp.,), 1 dc in next st., 1 pct., 1 dc in next st., ** Repeat pattern from * to ** to the end of round.

Fasten off yarn.
Re-attach Yarn 'A' on any chain of the foundation row. You will now be working in the opposite direction on that foundation row (i.e. from the top of the purple Ra-Ra frill, upwards to the waist).
R8. -
Ch.1, work one dc in every st to end, join with a sl st., change to Yarn 'B'.
R9. -
Using Yarn 'B', ch.1, dc in every st around, join with a sl st.
R10. -
(Work 'blo' for this entire round).
Ch.3, 1 tr in into every st to end, join with a sl st to top of beg ch.3.
R11. -
(Work 'blo' for this entire round).
Ch.3, 1 tr in each of the next 13 sts., tr2tog., * 1 tr in each of the next 14 sts., tr2tog., ** Repeat from * to ** to end of round, join with sl st to beg.
R12. -
(Work 'blo' for this entire round).
Ch.3, * 1 tr in each of next 15 sts., tr2tog., ** Repeat from * to ** to end of round, join with a sl st to beg.
R13. -
(Work 'blo' for this entire round).
Ch.3, * 1 tr in each of next 8 sts., tr2tog., ** Repeat from * to ** to end of round, join with a sl st to beg.
R14. -
(Work 'blo' for this entire round).
Ch.3, * 1 tr in each of next 7 sts., tr2tog., **
Repeat from * to ** to end of round, join with a sl st to beg.
R15. -
(Work 'blo' for this entire round).
Ch.3, * 1 tr in each of next 12 sts., tr2tog., **
Repeat from * to ** to end of round, join with a sl st to beg. Fasten off yarn.
[[[ Alternative instructions for R10 to R15 ]]]
If you find it difficult (or just don't want to, haha) to follow the stitch counts in the above instructions, here is what is happening on those Rounds.
R10 - No decreasing. One tr made in every stitch around.
R11 - A total of five (5) decreases (tr2tog) are made evenly around. 1 tr in all other stitches around.
R12 - A total of five (5) decreases (tr2tog) are made evenly around. 1 tr in all other stitches around.
R13 - A total of eight (8) decreases (tr2tog) are made evenly around. 1 tr in all other stitches around.
R14 - A total of eight (8) decreases (tr2tog) are made evenly around. 1 tr in all other stitches around.
R15 - A total of five (5) decreases (tr2tog) are made evenly around. 1 tr in all other stitches around.
Knitted Ribbed Waistband:
Using 4mm circular knitting needles and Yarn 'B', cast on 120 stitches.
R1. - * k2, p2 ** Repeat this rib pattern to end. Turn.
R2. to R16. - Repeat Row 1. Cast off and fasten yarn.
Belt Loop: (make 5)
Using 3.5mm hook, and Yarn 'B'. Leave long tails at least 6" at beg and end for sewing to waistband later.
Foundation row - Ch.4. Turn.
R1. - 3 dc across row, turn.
R2. - Ch.1, 3 dc across row, turn.
Repeat Row 2 until you have completed 10 rows (or the width of your waistband). Fasten off.
Belt:
Using Yarn 'A', and 3.5 hook.
Foundation row - Ch.107, turn.
R1. - 1 dc in each ch to end, turn.
R2. - Ch.4, *(skip 1 st.) 1 tr in next st., ch.1., ** Repeat to end, turn.
R3. - Ch.1, 1 dc in every tr & 'ch.1' sp of prev row. Fasten off.
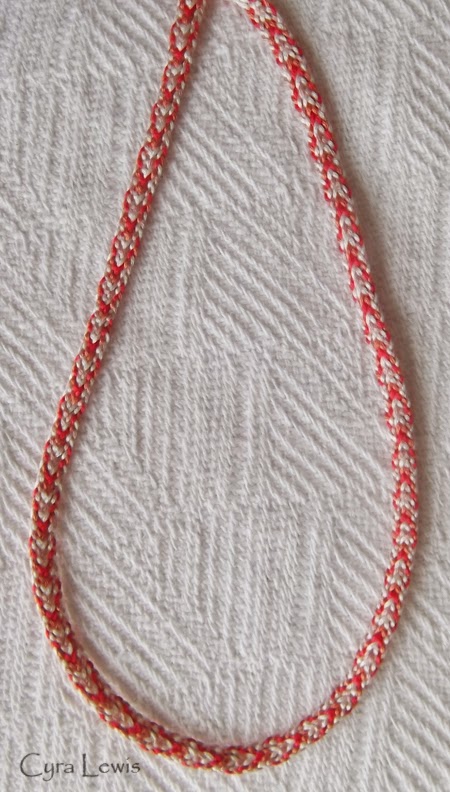
Belt Ties:
Using Yarn 'A', and 3.5 hook.
Make a foundation chain of about 180 ch.. Fasten off.
Making Up the Garment:
Sl st (or sew if you prefer) the waistband to the top of the skirt.
Pin, and then sew the 5 Belt Loops in place (see following photos for placement of Loops)
 |
| Three Belt Loops Across the Back of the Skirt |
Thread the Belt Tie through the spaces between the tr on the belt.
The Belt Tie should be longer than the Belt to allow for tying in a bow.
Pass the Belt through the Belt Loops on the skirt
Push the Belt up on the Belt Ties to make a 'ruffle'.
This adjusts the size to fit the child.
If you would like to share this pattern on your blog
PLEASE LINK back to this page.
DO NOT "copy & paste" the instructions.
This is a FREE PATTERN
and may be printed out to create garment(s) for your own use, but the pattern may not
be sold in printed, digital, or any other form.
...............................................................