Showing posts with label baby. Show all posts

16 May 2017

Christmas Trees - Hexies - Baby Blanket

Christmas Trees

I have added the beads decorations to my little Christmas trees on the woven felt hearts, and buttonhole stitched around the hearts.
Just have the hanging ribbons to add before I can call them finished.


Neapolitan Ice Cream Baby Blanket

It's Finished. 
Yay, I have a FO to add to my YOP page.
It's called Neapolitan Ice Cream because it is the Chocolate, Strawberry & Vanilla ice cream colours of the Neapolitan ice cream blocks that I used to buy when my kids were young.
The pattern for this will be in my Ravelry projects soon.


Hexie Quilt

A few bright greens have been added. 
A LOT more bright greens are yet to be added, lol.


And, a large, fiber related, street art project is in the planning stage for Oct/Nov.
I'm starting to gather the necessary 'bits & pieces' for it.
I hope Tony doesn't want to put the car away in our garage before Nov, lol.

Happy Stitching


10 May 2017

Christmas Hearts

A Christmas Project WIP

In preparation for a Christmas in July group project. 
Everyone gets to make four of these Heart Christmas Tree decorations, and decorate them as they wish. 
I know there are only three here, but that is because my 1st one was used as the demonstration piece to show the group, and I no longer have it. Other members had difficulty putting the hearts together, so I made up most of the 50+ hearts for them to embellish.
These three will have a Blanket stitch edging and beads added to decorate the crocheted tree.


A plain and simple crocheted baby blanket WIP. Not finished yet, but just the border to do now.
Some brainless crochet to do while sitting in the garden enjoying a glass of wine and the last of the sunny days before winter is upon us.


My mothers bobbins sorted out nicely.


Happy Stitching


21 November 2016

Oh My Goodness, Did You Miss Me

I can't believe so many weeks have passed and I didn't get to blog about anything.
I am truly sorry to my regular readers who like to see what I am up to.
It has been a long month (nearly two months to be precise).

I'll not bore you with details of the non-stitching stuff (because, frankly, it WAS mostly really boring stuff).

A big FO for me was this Freeform Weaving project.
Inspiration from my garden.
Size is about 22" x 15".
Includes freeform crochet scrumbles.


_________________________________________________________________

I also finished the baby blanket and have sent that off.


This was the blanket that someone else started but passed away before finishing it.
The 'trouble' was that all the circles were different sizes, and it's nearly impossible to put circles together with a straight edge.
Anyway, I think I managed to make a reasonable blanket for the grandchild of the deceased lady, even if it does have uneven edges and quite a few 'hills & valleys'.
It has plenty of character, definitely not perfect, and holds many of life's little hiccups within it's essence.
It will be treasured for all the right reasons though.


________________________________________________________

I have actually finally got my Ocean Freeform Challenge piece bordered, backed, quilted and hanging properly.
I wanted to finish it ready to hang in an exhibition.
I can now add that to my FO list.


________________________________________________________

I attended a craft workshop at one of my local groups.
We made these mixed media canvas pieces.


This blue one is my piece.


_____________________________________________________________________

Yesterday I finished a circle weaving project using a home-made recycled plastic bowl for a loom.


______________________________________________________

So, that's me..... finally caught up with blogging about my makes and creations.
Phew!!!


This has been another YOP post for your enjoyment.


27 September 2016

A bit of fun stitching

I've managed to get quite a bit of stitching done on some fun projects over the week, so here are my current project photos.

Completed Band 1 of the Embroidery Sampler.
The blue and purple are the additions this week.


And a childs cheerful crochet Beanie Beret of my own design.


Also, a little update on the Party At My Place Quilt. Two more 'building blocks' added.


And some progress on a baby blanket that somebody else made, but I am repairing and joining the remaining circles.


So that was my stitchery week.
I have a lovely variety of projects still on the go.
I have a quilt wall hanging to finish off over the next few weeks, and the white circles baby blanket must get finished soon too, as the new baby it is for is due in October.


Hope you all have a great week ahead.
Happy Stitching


This has been another Year Of Projects post.


24 August 2016

Duodenary Ravellenics Events - & YOP

The yarn events at Ravelry have finished. Here are my latest event finishes, and counting them off on my YOP list too.

Bag Backstroke event - A Freeform Project-Holder Bag
I have overcome my 'fear' of knitting with this project, as it contains 4 different knitted parts. I had to teach myself how to cast-on again though, because I'd forgotten how to do that, lol.
More photos of this are on my Ravelry project page here.


Sock-put event - Bootie Slippers


Afghan Marathon event - Afghan Blanket/Comforter


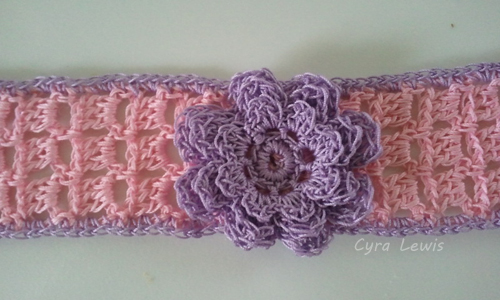
Hat Dash event - Pink and Purple headband


Household Heptathlon event - Basket to hold my Threads


Household Heptathlon event - A Star Coaster for my glass of wine (or gin)


Household Heptathlon event - A woven and crocheted bookmark for my favourite book of poems


And with the 5 previously posted events:
Sweater Triathlon event - White baby cardi
Sweater Triathlon event - pink pullover
Toy Toss event - Hug-a-monster
Frogging Trampoline event - Frogging thing
Garment Polo event - Toddler skirt

12 finishes altogether over two weeks.
That makes me a Duodenary, lol.

Ravellenics ran from the 5th to the 21st August.

I would officially like to thank my DH for going away for the two weeks.
While the cat's away the crocheter will play, lol.

And, over the last two days since the Ravellenics finished, I have been sorting out and unpacking my craft room. I have re-made the flat-pack shelving, and along with the new set of shelving on top of the flat-packed ones, I now have ample shelving for books and equipment, and I have arranged it so that my new sewing table slots into a space under (and between) the shelves.
I'll get photos for next week to show what I mean. I'm so excited to have a dedicated room for my 'stuff'.

14 August 2016

Some finishes for YOP

I have been crocheting away for the Ravellenics Events (on Ravelry) and I have crossed the finished line with these items.

A cute pink top for a baby. (Sweater Event)


A Happy Huggy Monster (Toy Toss Event) - Amigurumi


And I have even Frogged this (for the Frogging Event)
I have no idea what it was meant to be, and I cannot even remember how long ago I made it, I only know it had to go.


And with the frogged yarn I made this little skirt (Garment Event)
My own design.


I'm having so much fun with the Ravellenics Events. 
There is still another week to go yet, and I still have a few more items on my to-do list that I'm hoping will get made in time.

And with that, I have 3 (yes, one, two, three, lol) FO's for my YOP


This has been another YOP post.

Thank you for visiting.


07 August 2016

YOP & Team Party at Ravellenics

The Games at Ravelry (Ravellenics) have begun
and I've competed in my first event - the sweater triathlon.
Here is my baby cardi for this event.
The pattern is from Here


I can add a Finish to my YOP list with this one.
Can I get a yayyy!

On to my next event now.

Go Team Party

_____________________________________

This is a Year Of Projects post


10 September 2014

Gone Crazy Quilting Again

Doing a happy dance..... enjoying myself again this week. My sewing machine was packed away ready for the move, but I was so lost without it that it just had to be UNPACKED again for a special Crazy Quilting 'playtime'.

18" Cushion


And another crochet afghan baby blanket in pink & lemon this time.


Back to the packing.......... I really DO have a lot of stuff.


02 November 2013

Free Pattern - Crochet Ra Ra Skirt - 1 to 3 years old

Free Pattern - From Cyra Lewis

Ra Ra Skirt - age 1yr to 3yrs  - Crochet and Knitting.


This Pull-On skirt measures:
Length .... 10.5" (27cm)
Waist .... 14" - 23" (36cm - 58cm) 
the larger width is measured with the waistband stretched but still comfortable.

Swatch size: 4 inches = 15 tr (blo) x 9 rows

I work loosely. If you have a tight tension then your garment will end up slightly smaller. 

Variations to ths size can be made by altering the thickness of the yarn, and by changing the hook size.

The purple 'Ra Ra' bottom piece is an open lacy pattern.
The stretchy waistband is knitted ribbing with crocheted belt loops and a ruffle belt that has the unique ability to 'grow' with the child.

Materials

Yarn 'A' :          1 ball Windsor Acrylic Double Knit Opal in Purple
Yarn 'B' : 1 ball Windsor Acrylic Double Knit Variegated to match

Crochet hooks - 3.5mm & 4mm
Circular Knitting Needles - 4mm

Abbreviations  
(English Crochet Terminology)

sts..... stitches
sl st..... slip stitch
sp..... space
ch.....chain stitch
dc.....double crochet
tr.....treble
dtr.....double treble
pct.....picot
dec.....decrease
beg.....beginning
prev.....previous
blo.....back loop only
tr2tog....treble 2 together 


Instructions

Starting with the purple yarn and the 4mm hook we will make the 'Ra Ra' part of the skirt first.

Foundation Row : 
Ch.90. Sl st to the first ch (making sure not to twist the foundation chains) to make a circle. You will now be working in the Round. The outside is the right side. Keep the right side facing you. Do not turn.

R1.
Ch.3, 4 tr in same ch., ch.2, (skip next 2 ch.), dc in next ch., *ch.2, (skip next 2 ch.), 5 tr in next ch., ch.2, (skip next 2 ch.) dc in next ch., **    Repeat from * to **14 times. Ch.2, sl st to top of beg ch.3 stitch.


R2.
Ch.3, 1 tr in each of next 2 sts., ch.2, 1 tr in same place as prev tr, 1 tr in each of next 2 sts., * ch.3, (now, work into the next shell), 1 tr in each of the next 3 tr, ch.2, 1 tr in same st., 1 tr in each of next 2 sts. **   Repeat the shell pattern from * to **to the end of the round, sl.st to the top of the beg st of that round.


R3.
Sl st across the top of next 2 sts., (brings you to the tr just before the ch.2 sp.), ch.4, 3 dtr in the ch.2 sp., ch.2, 3 dtr in the same sp., 1 dtr in the next st., 1 dc in the ch.3 sp., * (skip 2 tr), 1 dtr in next st., 3 dtr in the ch.2 sp., ch.2, 3 dtr in the same sp., 1 dtr in the next st., 1 dc in the ch.3 sp., **  Repeat pattern from * to ** to end of round, sl st to 4th ch of starting st.


R4.
Sl st across next 2 sts., ch.4, 1 dtr in next st., 3 dtr in the ch.2 sp., ch.2, 3 dtr in same sp., 1 dtr in each of the next 2 sts., * 1 dtr in 3rd dtr of the next shell, 1 dtr in the next st., 3 dtr in the ch.2 sp., ch.2, 3 dtr in the same sp., 1 dtr in each of the next 2 sts., **   Repeat the pattern from * to ** to the end of the round, sl st to the 4th ch of starting st.


R5.
Sl st across next 2 sts., ch.4, 1 dtr in each of next 2 sts., 3 dtr in the ch.2 sp., ch.2, 3 dtr in the same sp., 1 dtr in each of next 3 sts., * (skip 4 dtr) 1 dtr in each of next 3 dtr.,  3 dtr in the ch.2 sp., ch.2, 3 dtr in same sp., 1 dtr in each of next 3 sts., **   Repeat pattern from * to ** to the end of the round, sl st to 4th ch of starting st.


R6.
Ch.6, * 2 dtr in next ch.2 sp., ch.5, 2 dtr in same sp., ch.2, 1 dtr in the diamond shaped sp between 2 shells of the prev round, ch.2, **   Repeat pattern from * to ** to end of the round, ending with 1 tr in 4th ch of beg ch.6 st.

R7.
Sl st back into last dtr made, dc in same st., * ch.5, dc in the next dtr., 1 pct [a picot consists of ch.3 and a sl st into 3rd ch from hook], 1 dc in next st., <1 dc., 1 pct., 2 dc., 1 pct., 2 dc., 1 pct., 1 dc.,>  (< to > are made in the same ch.5 sp.,), 1 dc in next st., 1 pct., 1 dc in next st., **   Repeat pattern from * to ** to the end of round.


Fasten off yarn.

Re-attach Yarn 'A' on any chain of the foundation row. You will now be working in the opposite direction on that foundation row (i.e. from the top of the purple Ra-Ra frill, upwards to the waist).

R8.
Ch.1, work one dc in every st to end, join with a sl st., change to Yarn 'B'.

R9.
Using Yarn 'B', ch.1, dc in every st around, join with a sl st.

R10.
(Work 'blo' for this entire round). 
Ch.3, 1 tr in into every st to end, join with a sl st to top of beg ch.3.

R11.
(Work 'blo' for this entire round). 
Ch.3, 1 tr in each of the next 13 sts., tr2tog., * 1 tr in each of the next 14 sts., tr2tog., **   Repeat from * to ** to end of round, join with sl st to beg.


R12.
(Work 'blo' for this entire round). 
Ch.3, * 1 tr in each of next 15 sts., tr2tog., **   Repeat from * to ** to end of round, join with a sl st to beg.

R13.
(Work 'blo' for this entire round). 
Ch.3, * 1 tr in each of next 8 sts., tr2tog., **   Repeat from * to ** to end of round, join with a sl st to beg.

R14.
(Work 'blo' for this entire round). 
Ch.3, * 1 tr in each of next 7 sts., tr2tog., **
Repeat from * to ** to end of round, join with a sl st to beg.

R15.
(Work 'blo' for this entire round). 
Ch.3, * 1 tr in each of next 12 sts., tr2tog., **
Repeat from * to ** to end of round, join with a sl st to beg. Fasten off yarn.

   [[[ Alternative instructions for R10 to R15  ]]]    
If you find it difficult (or just don't want to, haha) to follow the stitch counts in the above instructions, here is what is happening on those Rounds.

R10 - No decreasing. One tr made in every stitch around.

R11 - A total of five (5) decreases (tr2tog) are made evenly around. 1 tr in all other stitches around.

R12A total of five (5) decreases (tr2tog) are made evenly around. 1 tr in all other stitches around.

R13 A total of eight (8) decreases (tr2tog) are made evenly around. 1 tr in all other stitches around.

R14A total of eight (8) decreases (tr2tog) are made evenly around. 1 tr in all other stitches around.

R15A total of five (5) decreases (tr2tog) are made evenly around. 1 tr in all other stitches around.


Knitted Ribbed Waistband

Using 4mm circular knitting needles and Yarn 'B', cast on 120 stitches.

R1. - * k2, p2 **   Repeat this rib pattern to end. Turn.

R2. to R16. - Repeat Row 1. Cast off and fasten yarn.


Belt Loop: (make 5)

Using 3.5mm hook, and Yarn 'B'. Leave long tails at least 6" at beg and end for sewing to waistband later.

Foundation row - Ch.4. Turn.

R1. - 3 dc across row, turn.

R2. - Ch.1, 3 dc across row, turn.

Repeat Row 2 until you have completed 10 rows (or the width of your waistband). Fasten off.


Belt:

Using Yarn 'A', and 3.5 hook.

Foundation row - Ch.107, turn.

R1. - 1 dc in each ch to end, turn.

R2. - Ch.4, *(skip 1 st.) 1 tr in next st., ch.1., **   Repeat to end, turn.

R3. - Ch.1,  1 dc in every tr & 'ch.1' sp of prev row.   Fasten off.


Belt Ties:

Using Yarn 'A', and 3.5 hook.

Make a foundation chain of about 180 ch.. Fasten off.


Making Up the Garment:

Sl st (or sew if you prefer) the waistband to the top of the skirt.

Pin, and then sew the 5 Belt Loops in place (see following photos for placement of Loops)

Three Belt Loops Across the Back of the Skirt


Two Belt Loops on the Front of the Skirt


Thread the Belt Tie through the spaces between the tr on the belt.


The Belt Tie should be longer than the Belt to allow for tying in a bow.


Pass the Belt through the Belt Loops on the skirt


Push the Belt up on the Belt Ties to make a 'ruffle'.
This adjusts the size to fit the child.


   If you would like to share this pattern on your blog   
   PLEASE LINK back to this page.   
DO NOT "copy & paste" the instructions.

   This is a FREE PATTERN    
   and may be printed out to create garment(s) for your own use, but the pattern may not    
   be sold in printed, digital, or any other form.    


You should be reading this pattern on my http://free-form-stitching.blogspot.com site.


...............................................................