20 November 2016

Warping a Rigid Heddle Loom - Tutorial


How To Warp A Rigid Heddle Weaving Loom

Looking from the back of the loom, this is the 'take-up bar' that your warp threads are tied to. 
The bar is attached to the rear roller with string. This should be permanently attached, and ready to warp for your next project.


The rear ratchet should be in the LOCKED position.


The warp threads are attached to the rear 'take-up bar'. 
(Note - I usually attach my rear warps first, but I know other weavers who like to to attach their front warps first. I don't think it is set in concrete which way it should be done. It's your personal preference).
Lay your lengths of warp threads on the loom. Start in the middle of the rear 'take-up bar'.
I usually hold about 8 to 10 threads in hand, pass them from the front of the loom over the heddle and over the rear 'take-up bar', pass the ends under the bar, split the threads evenly before bringing back on either side, and over the top, of the whole bunch of warp threads, and tie in a double knot. Don't tie too tightly just yet, in case you need to adjust the tension or position of any once you have tied all your warp threads to the 'take-up bar'.


Carry on tying your warp threads to the back bar.


 Hot tip:  Number a couple of sheets of recycled printer paper. Orientate the paper to landscape position, and write your Large numbers on the bottom of the paper.
Use this paper (starting with number 1), to slide in between the warp and the rear roller, as you turn the ratchet to take-up the excess warp thread. 
As your work (weaving cloth) progresses you can easily keep track of how much warp you have left on your back roller by checking what number you are on with the paper.


My project in this photo is about 15 inches wide, so I had to use two sheets of paper slightly overlapping. One piece was the numbered one and the other sheet was blank.


Carefully wind the back ratchet so that the 'take-up bar' is pulled towards the back roller, and start adding your paper as you roll. Kepp rolling the warp and paper until you only have enough yarn left to reach to the front roller.

Note: Remember to put the locking lever to the LOCKED position on the back roller ratchet.

Next you have to thread the warp through the heddle.
Most looms come complete with a special heddle hook that fits easily between the slots and into the holes to make threading each individual warp a lot easier for you.


The heddle has holes and slots. Warp thread is passed through each slot and hole in order.
As I am using a variegated thread for my warp, I do not have to worry about placement of different colours for this project. But if you are planning a particular pattern, then the warp threads might have to be threaded in a certain order for the pattern to show. Refer to your pattern instructions if you are using a pattern.
If this is your first weaving on a heddle, I would choose a solid colour warp thread, or a variegated like mine.
Hot Tip: Do not use a stretchy warp thread, especially if this is your first weaving project. Wool yarn is not suitable for warping because it stretches too much and you cannot keep good tension while weaving. There are special warp threads that can be purchased especially for this job, or you can use cotton, strong string, or similar.
I am using carpet weaving cotton which is strong and non-stretchy, but it is a bit 'hairy' as the following photo shows.


Here are all my warp threads hanging down loose after being threaded through the heddle.
This is when you make sure that you have enough length at the front of the heddle to tie the warp to the front 'take-up bar'.
If you need some more thread, just release the latch that is locking the back ratchet, and slowly pull enough warp for tying up.


Now tie your warp threads to the front 'take-up bar' in the same way that you tied the back bar.
Tighten the front ratchet to a suitable tension, and make sure that the locking lever is in the LOCKED position.


Voila!!! A warped Rigid Heddle Loom ready for weaving.

I hope you enjoyed this tutorial and can now warp your loom with ease.
Follow this blog to get first hand updates for when I upload more tutorials.

Happy Weaving


Circle Weaving (How-To) Tutorial

A Circle Weaving (How-To) Tutorial

with an upcycled loom


I do not have a circle loom, so I made my own from a plastic pudding bowl.

I cut the top of the bowl off about 15mm from the top lip and then cut 'V' notches around it.
I ended up with 49 notches. An uneven number of 'spokes' is preferable if you want to weave round-and-round in a continuous spiral technique.


To hold the warp threads, these notches were then carefully bent outwards to be able hold the warp in place.


Tie your warp to the ring with a slip knot, and start winding it back and forth across to the opposite side of the circle. Always looping around the next notch in the same direction you are heading.


When you get all the way around, tie the other end of the warp thread to the ring with another slip knot.


Using a blunt ended tapestry needle (or similar), tie your thread (or yarn), with a knot on the back of the piece, around the very centre of the 'spokes'. This knot 'holds' all the 'spokes' together and also attaches the weaving thread. 
I chose to use the same thread as the warping thread for the middle of my circle weaving. You can use whatever thread or yarn you like on your piece.


Start weaving in an under-over motion, or whatever weaving method you prefer.
When changing colour, you secure the thread by sewing it through some weaving stitches on the back before bringing the needle and thread to the front for weaving.

After the middle 10mm or so of weaving all the way around, I changed my thread for the purple metallic and wove a wedge shape off to one side.


I had no particular plan for the design. I was just looking for something contemporary and arty decorative.
A few more wedge shapes later, and I'm back to weaving all the way around with dark purple.


The dark purple thread holds the completed design together very well as the wedge edges are not joined to the next wedge. There is an open gap between them.

When you are happy with your design you can untie the warp slip knots and slide the warp wraps off of the loom notches. You will then need to secure the two warp loose ends by threading through the back of the weaving and hide all ends.


Happy Weaving


27 September 2016

A bit of fun stitching

I've managed to get quite a bit of stitching done on some fun projects over the week, so here are my current project photos.

Completed Band 1 of the Embroidery Sampler.
The blue and purple are the additions this week.


And a childs cheerful crochet Beanie Beret of my own design.


Also, a little update on the Party At My Place Quilt. Two more 'building blocks' added.


And some progress on a baby blanket that somebody else made, but I am repairing and joining the remaining circles.


So that was my stitchery week.
I have a lovely variety of projects still on the go.
I have a quilt wall hanging to finish off over the next few weeks, and the white circles baby blanket must get finished soon too, as the new baby it is for is due in October.


Hope you all have a great week ahead.
Happy Stitching


This has been another Year Of Projects post.


12 September 2016

New Leaf Freeform Project

Last week I showed you the flower scrumbles that were the start of this New Leaf Project.
This week I have made a good start on the 'greenery' background to this project.
I warped up my rigid heddle loom with a coarse random variegated yarn, and now I'm on the fun part.
The weaving, so far, consists of 'normal' loom weaving using the heddle and shed, and I'm also using needle weaving and various knots in a spontaneous way to create an abstract garden scene.

After viewing this photo on my phone/camera (and here in 2D) I think it could also be interpreted as a country landscape scene, whereas I was imagining it, while making it, as a birds-eye view of a garden, I can now see it's dual perspective.
I shall have to just carry on and see where my muse takes me.

A little bit of stitching has been made on my Crazy Quilt block, but not enough to take a photo.

More tidying/unpacking in my craft studio has given me a much better workspace.

Mid-week, I actually baked two cakes. Not very often I get the urge to make a cake, but I thought I would give Tony a treat now that he is back home again.

Saturday morning just after 10am we had a bit of an earth quake here. It rocked me in my armchair from side to side, and if my cup of tea had been full it would have spilled on the side-table.

A lovely sunny day yesterday saw me in the garden catching up with some weeding around the paths.

That was my week.

Happy Stitching


05 September 2016

Little Bag #2

Little Bag #2 is HOTH (hot off the hook)


A fun and quick project that kept me interested and occupied in between the unpacking of my book boxes, and I'm still re-making some more flat-pack shelves for the craft room, a new arm chair has arrived for that room too (thank you Tony), and he is up in the roof space at the moment getting the aerial wires sorted for the tv. Evidently the junction box thingy that he bought that boosts the satellite signal isn't working.

A new freeform crochet project is in the early planning stage. (New Leaf FFAL on Ravelry)
My thought for this is "Spring is in the air" (it is here is NZ), new life abounds in the gardens, trees are budding up nicely, flowers are emerging, and the Spring hare are having fun in the field behind our garden.
These yarns made the first cut in my grab-box for this project. I'm trying not to include any blue, green or purple in this first part of the project, but I see a pale lilac mohair (bottom right) has crept into the box while I wasn't looking.


Anyway, lots more to do today, so I'm off now to explore more boxes and fill up those shelves.


Happy Stitching


30 August 2016

When is it going to be Spring

 When it's spring again 
 I'll sing again 
 Tulips from Amsterdam  

Winter has dragged on here (New Zealand), and I'm longing for spring to arrive. I need more sun in the days please. Today was a teaser of what is to come. I managed to actually get three loads of washing on the line and dried. First time I've been able to do that for a long time.

Anyway, enough of my dribble - here's what I have been up to this past week.

I attended an online workshop by JThouse to learn how to make her motif called 'Dione'.
I played YARN CHICKEN with it .... and lost. I ran out of thread just before the very last three picot edgings to the very last 'leaf'. How very annoyed I was (hah! I won't repeat here what I actually said).
But at least I now know how to make the motif.


 Embroidery on my Crazy Quilt block #8. 

Filling in details on some motifs.


Craft Room Organising

Since moving into our new home back in March, this room was 'earmarked' for my craft studio, and also as a spare tv lounge.
This part of the room is my sewing area. All my craft books will be on the bottom shelves, and then all my sewing equipment will be on the top shelves close at hand for my sewing/project table.
The three red stacked boxes on the floor on the left have more of my books yet to be unpacked, I hope they will all fit on the shelves ok.
I'm looking forward to having this place sorted soon so that I can plug in my sewing machine that I have not been able to use for well over a year now.
All this in the photo has been in storage all that time as well. Unpacking it is like Christmas and lots of birthdays all arrived at once and I am being reunited with long lost friends here too, lol.
I hope to have the table clear by next week and carry on sorting the other parts of this room, some of which will be the art & designing area. Lots more unpacking yet.


So that was my busy week.


And this has been another YOP post

Happy stitching


24 August 2016

Duodenary Ravellenics Events - & YOP

The yarn events at Ravelry have finished. Here are my latest event finishes, and counting them off on my YOP list too.

Bag Backstroke event - A Freeform Project-Holder Bag
I have overcome my 'fear' of knitting with this project, as it contains 4 different knitted parts. I had to teach myself how to cast-on again though, because I'd forgotten how to do that, lol.
More photos of this are on my Ravelry project page here.


Sock-put event - Bootie Slippers


Afghan Marathon event - Afghan Blanket/Comforter


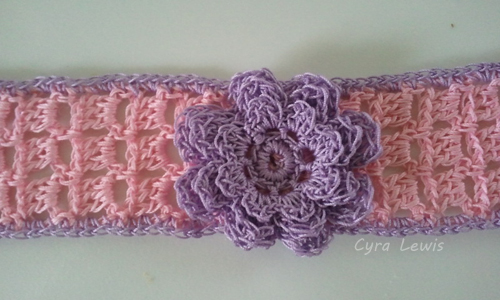
Hat Dash event - Pink and Purple headband


Household Heptathlon event - Basket to hold my Threads


Household Heptathlon event - A Star Coaster for my glass of wine (or gin)


Household Heptathlon event - A woven and crocheted bookmark for my favourite book of poems


And with the 5 previously posted events:
Sweater Triathlon event - White baby cardi
Sweater Triathlon event - pink pullover
Toy Toss event - Hug-a-monster
Frogging Trampoline event - Frogging thing
Garment Polo event - Toddler skirt

12 finishes altogether over two weeks.
That makes me a Duodenary, lol.

Ravellenics ran from the 5th to the 21st August.

I would officially like to thank my DH for going away for the two weeks.
While the cat's away the crocheter will play, lol.

And, over the last two days since the Ravellenics finished, I have been sorting out and unpacking my craft room. I have re-made the flat-pack shelving, and along with the new set of shelving on top of the flat-packed ones, I now have ample shelving for books and equipment, and I have arranged it so that my new sewing table slots into a space under (and between) the shelves.
I'll get photos for next week to show what I mean. I'm so excited to have a dedicated room for my 'stuff'.

14 August 2016

Some finishes for YOP

I have been crocheting away for the Ravellenics Events (on Ravelry) and I have crossed the finished line with these items.

A cute pink top for a baby. (Sweater Event)


A Happy Huggy Monster (Toy Toss Event) - Amigurumi


And I have even Frogged this (for the Frogging Event)
I have no idea what it was meant to be, and I cannot even remember how long ago I made it, I only know it had to go.


And with the frogged yarn I made this little skirt (Garment Event)
My own design.


I'm having so much fun with the Ravellenics Events. 
There is still another week to go yet, and I still have a few more items on my to-do list that I'm hoping will get made in time.

And with that, I have 3 (yes, one, two, three, lol) FO's for my YOP


This has been another YOP post.

Thank you for visiting.


07 August 2016

YOP & Team Party at Ravellenics

The Games at Ravelry (Ravellenics) have begun
and I've competed in my first event - the sweater triathlon.
Here is my baby cardi for this event.
The pattern is from Here


I can add a Finish to my YOP list with this one.
Can I get a yayyy!

On to my next event now.

Go Team Party

_____________________________________

This is a Year Of Projects post